Module Setup
After creating a popup in the XBuilder component, you need to configure a module to display it on your frontend. This guide explains how to set up and configure the XBuilder Popup module.
Creating the Module
Step 1: Access Site Modules
- Log in to your Joomla administrator panel
- Navigate to Content → Site Modules
- Click the New button in the toolbar
Step 2: Select Module Type
- In the module type selection screen, find XBuilder Popup
- Click to select it
- The module configuration screen opens
Use the search box and type "XBuilder" to quickly find the module type.
Module Configuration
Basic Settings
Title
- Enter a descriptive title (e.g., "Newsletter Popup" or "Holiday Promotion")
- This title is for admin reference only
- Set Show Title to "Hide" (popups don't need visible titles)
Position
Select a module position from the dropdown. The position affects when the module loads, not where the popup appears (popups always display as overlays).
Recommended positions:
| Position | Use Case |
|---|---|
debug | Testing (requires debug mode enabled) |
position-0 | Early loading position |
| Any available | Works with any position |
The module position only determines when JavaScript loads. The popup always appears as an overlay, regardless of position.
Status
Set to Published when ready to display the popup.
Module Tab General Settings
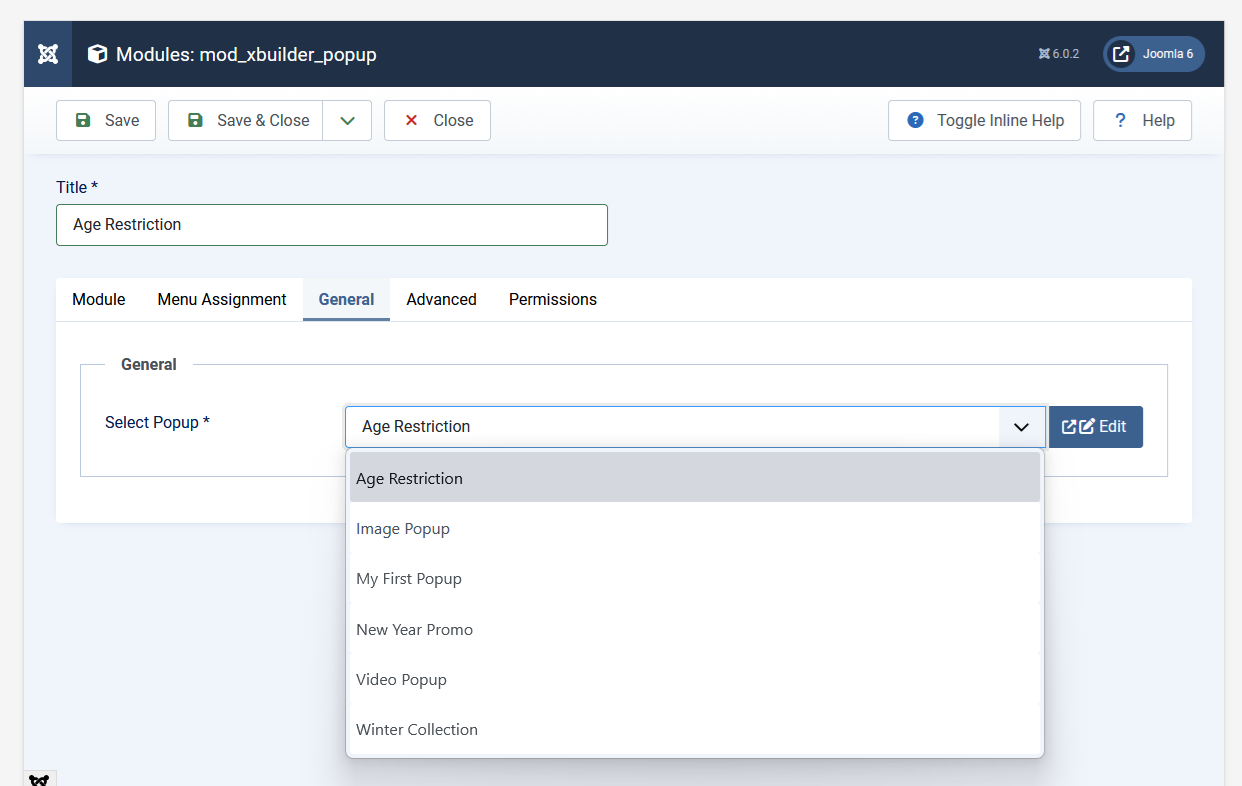
Select Popup
This is the most important setting:
- Click the Select Popup dropdown
- You'll see a list of all published popups
- Select the popup you want to display
- Only published popups appear in this list
If no popups appear:
- Verify you've created and saved popups in the component
- Check that popups are published (not unpublished or trashed)
Menu Assignment
Control which pages display the popup:
On All Pages
Module Assignment: On all pages
The popup displays on every page of your site.
Only on Selected Pages
Module Assignment: Only on the pages selected
- Select this option
- Check the menu items where popup should appear
- Popup only shows on selected pages
Example: Show newsletter popup only on blog articles:
- Select "Only on the pages selected"
- Check all blog category and article menu items
On All Pages Except Selected
Module Assignment: On all pages except those selected
- Select this option
- Check pages to exclude
- Popup shows everywhere except selected pages
Example: Don't show popup on checkout:
- Select "On all pages except those selected"
- Check the checkout/cart menu items
Access Tab
Access Level
Control who can see the popup:
| Level | Who Sees It |
|---|---|
| Public | Everyone (including guests) |
| Registered | Only logged-in users |
| Special | Authors, editors, and above |
| Super Users | Administrators only |
| Custom | Your custom access levels |
Common scenarios:
- Newsletter signup — Public (everyone)
- Member-only offers — Registered
- Admin notices — Super Users
Publishing Tab
Start Publishing
Set a date/time when the module starts displaying:
- Leave blank to start immediately
- Set future date for scheduled campaigns
Finish Publishing
Set a date/time when the module stops displaying:
- Leave blank for no end date
- Set for limited-time offers
Example: Black Friday Sale
Start Publishing: 2024-11-29 00:00
Finish Publishing: 2024-12-02 23:59
Ordering
If multiple modules are in the same position, set the order:
- Lower numbers load first
- Usually not critical for popup modules
Multiple Popups Strategy
You can create multiple module instances for different scenarios:
Different Popups per Page
- Create multiple popups in the component
- Create a module instance for each popup
- Use menu assignment to target specific pages
Example Setup:
| Module | Popup | Menu Assignment |
|---|---|---|
| Homepage Popup | Welcome offer | Home page only |
| Blog Popup | Newsletter signup | Blog pages |
| Product Popup | Special discount | Product pages |
User-Targeted Popups
- Create popups for different audiences
- Create modules with different access levels
Example Setup:
| Module | Popup | Access Level |
|---|---|---|
| Guest Popup | Sign up CTA | Guest |
| Member Popup | Upgrade offer | Registered |
A/B Testing
- Create two versions of a popup
- Create modules with different ordering
- Measure results and optimize
Saving and Testing
Save the Module
- Click Save or Save & Close
- Verify status is "Published"
- Check module appears in module list
Testing Your Popup
- Open your frontend site in a new browser tab
- Navigate to a page where the popup should appear
- The popup should display based on its trigger settings
If popup doesn't appear:
- Verify module is published
- Check menu assignment includes current page
- Verify popup is published in component
- Check popup trigger settings (on load, delay, etc.)
- Clear Joomla cache
- Check browser console for JavaScript errors
Debug Mode Testing
If using the debug module position:
- Enable Joomla debug mode:
- System → Global Configuration → System
- Set "Debug System" to "Yes"
- Set module position to "debug"
- Test on frontend
- Disable debug mode for production
Module Position Tips
For Production
Use any position that loads early in your template:
position-0orposition-1- Template-specific early positions
debug(if debug mode will remain on)
Position Doesn't Affect
- Where the popup appears (always overlay)
- Popup styling or content
- Trigger behavior
Position Does Affect
- When JavaScript loads
- Module ordering with other modules
- Debug visibility
Common Configurations
Newsletter Popup (Exit Intent)
Position: position-0
Status: Published
Access: Public
Menu Assignment: On all pages
Limited Time Offer
Position: position-0
Status: Published
Access: Public
Menu Assignment: On all pages
Start Publishing: [Campaign start date]
Finish Publishing: [Campaign end date]
Members-Only Announcement
Position: position-0
Status: Published
Access: Registered
Menu Assignment: Only on selected pages (member area)
Next Steps
- Joomla Integration — Embed articles and modules
- Triggers Overview — Configure when popups appear
- Troubleshooting — Common issues and solutions